skip to main | skip to sidebar

Pages

  • Home

Our Taste Tests

Smore's Cookies

Tuesday, September 11, 2012 | Publish by Thaydra

  While trying to come up with ideas for what type of cookie to bring to a Taylor Swift themed birthday party, I tried to choose between Cowgirl Cookies or Smore's Cookies.  In the end, I decided to go with both!

  These cookies are more of a bar-type cookie.  They are very soft, and very sweet, so I would advise cutting them into smaller than normal portions!  They are very good, though, and that is the important part!   The only alteration I will make to them next time, and I will be making them again, is to crush up some extra graham cracker pieces and add it to the dough.  Other than that, delish!


Ingredients: 

1 package graham crackers, broken into squares
2 1/2 cups flour
1 teaspoon baking soda
1/2 teaspoon salt
1 teaspoon cinnamon
11 tablespoons butter, softened
1 cup brown sugar
1/2 sugar
2 eggs
1 teaspoon vanilla
1/2 cup chocolate chips
1 cup mini marshmallows


Directions:

Preheat oven to 375*F.  Line a 9x13-inch baking pan with parchment paper.  Arrange graham crackers to cover as much of the bottom of the pan as possible. 
Whisk together flour, baking soda, salt, and cinnamon in a bowl.   Set aside.
In a large bowl, cream together butter and sugars until light and fluffy.  Add eggs and vanilla.  Mix thoroughly.
Add flour minx to sugar mix and combine well.
Fold in chocolate chips and marshmallows.
Drop by tablespoons over graham crackers and press down to cover and spread evenly.
Bake for 15 to 20 minutes. 

0 comments

Cowgirl Cookies

Tuesday, September 11, 2012 | Publish by Thaydra

  A friend of mine's daughter was turning 10, and wanted a Taylor Swift theme for her birthday party.  Her request of me was to bring cookies.   I wanted to come up with a cookie that would somehow fit the theme, without taking too much effort, since I would be short on time to make them.  I decided on these cookies, which pretty much have that "everything thrown in" feel, and Smore's Cookies.   Both make me think of cowboys and cowgirls,  of sitting on hay bales around a bonfire in cowboy boots and skirts, of lightly strummed guitars while the stars twinkle overhead.


Ingredients:

1 cup butter, softened
1 cup sugar
1 cup brown sugar
2 eggs
2 teaspoons vanilla
1 teaspoon baking soda
2 teaspoons hot water
1/2 teaspoon salt
3 cups flour
1 cup chocolate chips
1 cup butterscotch or peanut butter chips
1 cup broken pretzel pieces

 Directions:

Preheat oven to 350*F.  Line a cookie sheet with parchment paper.
Combine the butter and sugars.  Beat until smooth.
Add eggs and vanilla and mix well.
Dissolve baking soda in hot water. 
Add baking soda water and salt to butter mixture and stir until blended.
Add flour, one cup at a time, mixing well between additions. 
Fold in the chocolate chips, butterscotch chips, and pretzel pieces.
Drop by tablespoons onto prepared pan and bake for about 10 minutes.

0 comments

Honey-Orange-Mustard-etc Glazed Chicken

Sunday, September 09, 2012 | Publish by Thaydra

   I had decided on the menu plan to make chicken drumsticks for tonight's dinner.  As I went into the kitchen to get it started, I realized I had absolutely no idea as to how I wanted to prepare them.  I knew I wanted something tasty, not fried, and not horribly difficult to make.  I took a look around the kitchen to see what we had, and decided to try my hand at just throwing some stuff together that sounded good.  What I came up with was perfect!  I am pretty dang proud of myself, because it is very rare that I pull something out of thin air.  I am usually a play-it-by-the-recipe cook, and it's almost always from a recipe! 


 The chicken came out slightly sweet, but with a hint of earthiness and bite that made it easy on the taste buds.  (It looked pretty, too, but I had to take a picture with my daughter's Ipod, since the camera is currently out of the area while my boyfriend is away.)  Here's what I did, with a guesstimate on the quantities, since I just threw stuff in without measuring:

Ingredients:
  • Package of chicken drumsticks, skinned (about 1 pound's worth)
  • 1/3-1/2 cup honey
  • 1/4 cup Dijon style mustard (or two very large tablespoons)
  • The juice from one medium orange
  • 1 tablespoon rosemary, crushed
  • 3 cloves garlic, finely minced
  • 1/4 teaspoon ground red pepper (I'm a bit of a wuss with spicy... adjust to your taste!)

Directions:
  1.   Arrange chicken in a baking pan.  (I used a glass 9x13-inch pan, and did not have any need to grease it.)
  2. Over low-med low heat, stir together honey and mustard until melty and combined.  Add remaining ingredients.  Adjust spices as desired to suit your tastes.  *Note:  The sauce on the stove tasted much sweeter than it actually turned out on the chicken.
  3. Once well combined, pour over chicken.  (I let mine sit, covered, for a couple hours, but I don't believe this is actually necessary.  I just already had stuff in the oven!)
  4. Bake at 375*F for 45 minutes, or until meat no longer pink and juices are clear. 

I served this with rice and corn.  My kids actually both liked it!  Score one for me!

Labels: chicken, chicken drumsticks, dinner, easy, honey, mustard 0 comments

Zucchini Pineapple Muffins

Sunday, September 09, 2012 | Publish by Thaydra


  I bought some zucchini at the store a week or so ago, and never figured out what I wanted to do with it.  Since I was having company over today, I wanted to have something a little sweet, but not overly so.  Zucchini bread entered my head, but then this recipe popped up on Pinterest and I figured it sounded good enough to try.  I am glad I did!   They turned out delicious!  My children and I are not big pineapple fans, but the pineapple lent just enough sweetness without being overpowering.  I may even add a little bit more next time!

 Ingredients:

4 eggs
1&1/2 cups sugar
2 teaspoons vanilla
1 cup oil
1&1/2 teaspoons cinnamon
3/4 teaspoon nutmeg
2 cups grated zucchini
1 cup crushed pineapple
3 cups flour
1 teaspoon salt
1&1/2 teaspoons baking powder
1&1/2 teaspoons baking soda


Directions:

  1. In a large bowl, combine eggs, sugar, vanilla, oil, cinnamon, and nutmeg until well blended and smooth. 
  2. Stir in zucchini and pineapple.
  3. In another bowl, combine flour, salt, baking powder, and baking soda. Add gradually to egg mixture until completely combined.
  4. Pour into greased or paper-lined cupcake pan, filling about 3/4 full.
  5. Bake at 350* for 20 minutes. 

0 comments

Peanut Butter Chocolate Chip Shortbread Cookies

Sunday, March 04, 2012 | Publish by Thaydra


I found this recipe at The View from Great Island.  Super easy to make.  Super delicious. 

Go there.  Read her blog post.  Look at her yummy pictures.  Then go make them. =)

Notes:  I left the wax-paper wrapped log in the refrigerator overnight.  I cut them the next morning.  They are very crumbly, but I just mooshed them together in my hands and flattened them out a bit and baked them for 13 minutes.  Yum.  You will definitely want a cup of coffee or glass of milk with them though!

Labels: baking, chocolate chip cookies, cookies, peanut butter 0 comments

Orange Cream Cheese Bread

Saturday, March 03, 2012 | Publish by Thaydra

I was in the mood to bake, and had a eensy bit of a sweet tooth.  While perusing Pinterest I came across this recipe at Just a Pinch.   It sounded delicious, and after reading the comments other people had made about its deliciousness, and realizing I had some oranges in there that needed using... I made it. 

*I should note, in case you didn't read through the comments on the recipe there, that people say you should definitely let this cool completely before cutting into it.  Otherwise, it crumbles apart very easily, and while still tasty, is not like eating a piece of bread. 

*Another note:  The original recipe at "Just a Pinch" states to use two pans for this recipe.  I used just one, as we like nice, large loaves.   That said, we then had to cook it for about 15-20 minutes longer, which caused the edges to brown significantly.  While this did not affect the taste really (it was still delicious), you could tell it was cooked longer, and the aesthetic value is not nearly as appealing.  Next time, I will follow directions and split it between two loaf pans.  

Ingredients:

1 8-oz box of cream cheese, softened
1/2 cup shortening
1&2/3 cups sugar
2 eggs
2&1/4 cups flour
1 teaspoon salt
1 tablespoon baking powder
1 cup milk
2 tablespoons grated orange peel
1/4 cup orange juice


Directions:

Preheat oven to 375*F.  Grease and flour a bread pan. 

Mix together the cream cheese and shortening until creamy.  Add in the sugar and mix until light and fluffy. Add in the eggs one at a time, blending well between each addition. 

In a separate bowl combine the flour, salt, and baking powder.  Add flour mixture to cream cheese mixture a little at a time, alternating with the milk.  Batter will be thick and creamy.   Mix in grated orange peel.

Pour batter into prepared pan and bake for about 55 minutes, or until a toothpick inserted in the middle comes out clean. 

Let cool for ten minutes, then sprinkle the orange juice over top.  Let cool completely before serving.

Labels: baking, bread, non-yeast bread, orange 0 comments

White Sandwich Bread

Tuesday, February 28, 2012 | Publish by Thaydra

   Yep, another bread recipe.  But this one actually rises enough to be an actual sandwich type bread.  Many of them are too short to make a really decent sandwich.  This one fixes that.  It's good, and we ate it all up right away.  I'm actually considering making another batch today.  This recipe was found via Pinterest  at Annie's Eats.


I didn't get a picture of it cut, and for that I apologize.  Maybe if I do wind up making more today, I'll get an updated picture of that part.  I may even make myself a sandwich!


Ingredients

3 ¾ cups all-purpose flour
2 tsp. salt
1 cup warm milk
1/3 cup warm water
2 tbsp. unsalted butter, melted
3 tbsp. honey
2 ¼ tsp instant yeast


Directions:

Put the rack in your oven at the lowest position, and preheat your oven to 200*F.  Once it's reached 200*, let it stay there for ten minutes, then turn it off.  Don't open the door.

Meanwhile, mix 3&1/2 cups of the flour with the salt in a large bowl of a mixer.  In another bowl, mix together the rest of the ingredients (minus the remaining flour).  Start your mixer and slowly add in the wet ingredients.  Increase the speed to medium and let mix for about 10 minutes, adding a tablespoon of flour at a time as needed after five minutes to keep the mixture doughy and not sticky. 

Turn onto a lightly floured surface and knead into a smooth ball.  Place in a lightly oiled bowl and turn to coat. Cover with plastic wrap and a towel, and put in the warmed oven.  Let double in size; about 40-50 minutes. 

On a floured surface, work the dough into a rectangle, about 1 inch thick and no longer than the size of your bread pan.  With long side facing you, roll into a cylinder, pressing the edges together. Turn seam up and pinch closed.  Place seam side down into a bread pan and press gently to touch all sides.   Cover with plastic wrap and place in a warm area to double in size; about 30 minutes. 

Keep one rack in the lowest position, and another in the middle, and preheat to 350*F.   Place a pan of boiling water on the lowest rack (at least 2 cups worth).  Uncover bread and place on middle rack and bake for about 45-50 minutes.  Remove and let cool.  


Labels: baking, bread, sandwich bread, white bread, yeast bread 0 comments

Tootsie Roll Fudge

Sunday, February 19, 2012 | Publish by Thaydra

My younger brother has an obsession with Tootsie Rolls.  Well, I'm not sure if it's still as huge now as it was when we were younger, but every time I see one I think of him.  So, when I found This Recipe at Taste of Home a couple years ago, I had to try it.  It was Christmastime when I found it, while scouring for yummy treats I could take and give as little gifts.  It was delicious!  When my brother's birthday came around this year, I decided to make it again, sans the M&M candies, and was just as pleased as last time.  It is very sweet, so a little goes a long way! 

I highly recommend you gather all of your ingredients, and have them measured and beside you as you do this.  You don't want to stop stirring to measure out 3&3/4 cups of powdered sugar!  It's a pain!  


Ingredients: 
  • 1 teaspoon plus 2 tablespoons butter, divided
  • 2 cups Tootsie Rolls (about one bag's worth)
  • 2 tablespoons peanut butter
  • 3&3/4 cups powdered sugar
  • 2 tablespoons milk
  • 1 teaspoon vanilla


Directions:

  1. Line a 9-inch square pan with foil and grease with 1 teaspoon of butter.  Set aside.
  2. In a heavy saucepan, melt remaining butter, Tootsie Rolls and peanut butter over low heat, stirring constantly.  
  3. Gradually stir in the powdered sugar, milk and vanilla.  Mixture will be very thick.
  4. Spread into prepared pan.  Let cool for a minute, then score with a knife into squares.  If desired, top with an M&M candy (this is particularly festive for holidays).  Cool.
  5. Using foil, remove from pan and break into pieces.  Store in an airtight container.

Labels: fudge, tootsie rolls 0 comments

Chicken and Spinach Alfredo Lasagna

Wednesday, February 15, 2012 | Publish by Thaydra


While I am a fan of lasagna, I rarely ever make it.  I know that my kids aren't too keen on the red sauced varieties, so I came up with this one.  None of the recipes I could find online matched the ingredients I had in my cupboards, so this one I just winged.  It's really the first recipe I've done all on my own.  I think it turned out pretty dang good.  I loved the crispy cheese on top.  My kids aren't too hip on spinach, though they liked the rest of it.  It made for wonderful leftovers for lunch the next day, too!


Ingredients:
  • 8-10 ounces spinach, quickly cooked and wilted (I used frozen.  Fresh would be awesome.)
  • 1 15-oz package of low-fat ricotta cheese
  • 1 cup shredded mozzarella
  • about 3 cups alfredo sauce (The link is to my homemade sauce.  Jarred would be fine, too.)
  • 12 lasagna noodles, cooked al dente
  • 2 cooked skinless chicken breasts (I broiled mine with a little salt, pepper and garlic powder.)
  • extra shredded mozzarella


Directions:

Preheat oven to 350*F. 
Mix together spinach, ricotta and mozzarella cheeses in a medium bowl.
In a 9x9 pan, pour a very thin layer of Alfredo sauce.  Lay 4 noodles side by side on top, to cover pan.
Spread half of the spinach and cheese mix evenly over the noodles.
Pour about a third of the Alfredo sauce over top.
Lay another layer of noodles, then spinach/cheese mix, then sauce again.
Top with one more layer of noodles.  Pour the remainder of the sauce over top.  Sprinkle with extra mozzarella.
Bake for 45-60 minutes.

Labels: alfredo, chicken, chicken alfredo, dinner, lasagna, spinach 0 comments

4-Ingredient Peanut Butter Cookies

Wednesday, February 08, 2012 | Publish by Thaydra

(left half are peanut butter cookies, right half has chocolate chip minis thrown in!)

I've had this recipe for years and years.  I must say, it is probably one of my favorite cookies to make.  Soft, chewy peanut butter cookies that I almost always have the ingredients for.  I mean, who doesn't usually have peanut butter, sugar, an egg and some vanilla laying around?   This time, I decided to mix it up and make another batch with some mini chocolate chips thrown in. So I guess those would be 5-ingredient cookies.    Super yum! 

They can come out a bit crumbly if you try to take them off the pan too soon.  But, that just means they are broken and must be eaten, right?!  That's my viewpoint, anyway.  =)

Ingredients:

1 cup peanut butter (can use creamy or chunky, based on your preference)
1 cup sugar
1 egg
1 teaspoon vanilla
handful or two of mini chocolate chips (optional)

Directions:

Preheat oven to 350*F.   Lightly spray a cookie pan with cooking spray.  
Mix all the ingredients together.  If using chocolate chips, mix the first 4 ingredients together, then stir in chocolate chips until you think you have enough (about 1/2 to 3/4 cup). 
Drop by rounded teaspoon onto prepared pan and lightly press down.
Bake for 5-7 minutes.  They will be super soft and puffy.  Let them sit for a few minutes and cool on the pan before trying to move.  I usually use 2 pans for these, and let one batch cool while the other cooks.

Labels: baking, chocolate chip cookies, cookies, peanut butter 0 comments

Honey Oat Bread

Sunday, February 05, 2012 | Publish by Thaydra


  Since the Rosemary Olive Oil Bread turned out so well, I was inspired to take a shot at another type of bread.  My boyfriend requested a Honey Oat bread, so I found a recipe at Epicurious that looked promising and decided to make a go of it. 

 Once again, it came out superb.  I'm so glad I finally got over my fear of bread!  It's my new found toy.  This one came out light, and delicious.  It's another one that the kids really enjoyed, as did my boyfriend and myself.  It makes great sandwich bread.  Or, it's delicious warm with melted butter and jam.  Or honey!  

I will definitely be making this bread again. 

Ingredients:

1&3/4 cups warm water
1 tablespoon active dry yeast
3/4 cups quick cooking oats
1/3 cup honey
3 tablespoon vegetable oil
2&1/2 teaspoons salt
about 5 cups flour

1 large egg, beaten
additional oats


Directions:

1. In a large bowl, dissolve yeast in 1/4 cup warm water.  Let stand for 10 minutes.
2.  Mix in remaining water, oats, honey, oil and salt. 
3.  Stir in enough flour to make a soft dough.  I used probably 4 cups, maybe a bit more. 
4.  Coat a large bowl with cooking spray.  Transfer dough to bowl, and turn to coat.  Cover with plastic wrap, then a towel, and let stand until doubled in size.  About 1 hour.
5.  Oil 2 bread pans.  Punch risen dough down, and, using remaining flour as needed to keep dough from sticking, form into 2 small loaves. 
6.  Place 1 loaf in each pan.  Cover again and let rise until doubled- about 20 minutes.
7.  Preheat oven to 350*F.   Brush the tops of risen loaves with the beaten egg, and then sprinkle additional oats over top. 
8.  Bake for about 40 minutes, or until tops are golden and a tester comes out clean. Cool completely.

Labels: baking, bread, honey, honey oat, oat, yeast bread 0 comments

Rosemary Olive-Oil Bread

Friday, February 03, 2012 | Publish by Thaydra


I finally broke my bread-making cherry.   Not just fiddled around with it a little, but actually broke it.   We're talking yeast, kneading, punching, and everything!  

 If you've read my blog before, you probably know that I am a big fan of the Artisan Bread that I've worked with in the past.  It's a yeast bread, but requires no kneading or punching- the two aspects of bread making that have daunted me the most.   It is a very tasty bread, and makes a superb pizza crust.  However, I had made it enough times that I was starting to get bored, and all of these recipes for all of these super tasty breads kept popping up everywhere- making my mouth water and my hands itch to make them! 

 I found this recipe for Rosemary Olive Oil Bread and, being the huge rosemary fan that I am, I had to try it.  I had everything right there in my kitchen, just begging to be used.  I read through the recipe a few times and thought, "It really doesn't sound that difficult."

 I was so right.  *high five*

It was absolutely delicious.  Even my kids ate it up!  It seriously didn't last more than a couple of days.  It has a very strong flavor- I will warn you.  Of course, I probably put in a tad bit more rosemary than the recipe called for.  But, if you are a fan of rosemary, you will adore this bread. 
Make sure to wrap it when not in use though.  It did get a little tough when left out overnight (once cut open).  But, not enough to keep us from munching it right to the crumbs!  It would be absolutely divine with some soup.  I'm thinking some Zuppa Toscana.  My mouth is watering just thinking about it. 

So, seriously-  If you've wanted to try your hand at baking bread, but have been put off by all the kneading and punching and stuff, (and you like rosemary) try this bread.  Super easy.  Super tasty!


Ingredients:

1 cup warm water
1 tablespoon sugar
2 teaspoons dry active yeast
1 teaspoon salt
2 tablespoons fresh rosemary, or 2 teaspoons dried
1/4 teaspoon Italian seasoning
1/4 teaspoon pepper
2 tablespoons olive oil
2 cups whole wheat flour, + more for kneading
1 egg, whisked
1 tablespoon water
extra rosemary


Directions:

1.  In a large bowl, combine the water, sugar, and yeast.  Let sit for 10 minutes.
2.  Stir in the salt, rosemary, seasonings, pepper, and olive oil.  Add the flour and stir until the dough forms a ball.  Knead on a lightly floured surface for about 5 minutes.
3.  Place dough in a lightly greased bowl and cover.  Let rise until doubled in size, about 1 hour. 
4.  Punch down the dough and form into a round loaf.  Cover and let rise until doubled; about 45 minutes.
5.  Preheat oven (and pizza stone) to 400*F.  When dough has risen, combine whisked egg with the water, and brush overtop the dough.  Sprinkle with extra rosemary.  
6.  Bake for 20-25 minutes until top is golden and it sounds hollow when tapped. 

Labels: baking, bread, olive oil, rosemary, yeast bread 0 comments

Salmon Cakes

Sunday, January 29, 2012 | Publish by Thaydra


  I had some canned salmon on hand that I had absolutely NO idea of what to do with.   I'd never really eaten it before, so wasn't really sure how you were suppose to prepare it, or what you were really even supposed to do to it.    So, I went online to search of course!   I found this recipe at Cooks.com.  I adjusted it to use the ingredients I had on hand, and to suit my taste buds. 

The base mix tasted like it might actually be pretty good as it was, on a warmed roll or bread perhaps.  Or even as a dip for crackers.  So I'll have to keep that in mind for the other can of salmon I have in there!


Ingredients:

for the cakes:
1 can of salmon (mine was about 15oz)
1 egg
1/4 cup light sour cream
1-2 tablespoons minced onion (or 1 small onion, minced- I was too lazy to cut one up)
1 tablespoon lemon juice

for the breading:
1/2 cup bread crumbs (I used Progresso's Italian flavor)
1 teaspoon dill


Directions:

Preheat oven to 350*F.

Combine all of the cake ingredients in a bowl.  Mix well.  Form into small cakes- it should make 8 small cakes. 

Combine the bread crumbs and dill in a shallow bowl.  Mix thoroughly.  Roll the cakes in the crumb mix, or hold the cake in your hand and liberally sprinkle the mix over the cakes (which is what I did).  

Place on a baking sheet.  If it is not a non-stick pan, coat with a thin layer of cooking spray.  Bake for 10-15 minutes, or until golden.

Labels: appetizer, baking, canned salmon, lunch, salmon 0 comments

Skittles Vodka

Wednesday, January 25, 2012 | Publish by Thaydra


   So, my boyfriend and I decided to give a try at making our own moonshine awhile back.  I was rewarded with about a gallon of the stuff (after diluting it).  We diluted it to about a 75-80 percent alcohol mix.   Now, what to do with that? 

  Online, on Pinterest actually (sorry, I don't have the pin of where it came from.. I just remembered how they did it), I found Skittles vodka.  I love Skittles, so this I had to try. 

  Take a small mason jar (or whatever bottle you have) and put about a handful of ONE color of Skittles into the bottom of it.  Fill it with vodka.  Put the lid on, give it a shake, and let it sit for about a week, shaking it at least once a day, or whenever you walk by it.  Eventually the Skittles dissolve.  They do leave a bit on gunk in there, so we filtered it through a coffee filter into another bottle. 
**Note:  The pictures are from before we filtered it.

  I really liked the red one mixed into some Diet 7-Up.  Tasty!! 

Labels: alcohol, alcoholic drink, moonshine, skittles, vodka 0 comments

Chicken Alfredo and Spinach Pizza

Monday, January 23, 2012 | Publish by Thaydra


Earlier in my blogger postings, I showed you how to make the Artisan Bread  and then just recently was the Alfredo Sauce .    Last night we combined these two with some diced chicken and spinach to make a wonderful pizza.   It was oh-so-yummy.  I couldn't stop eating, and will probably need to spend a couple hours on the treadmill today to make up for it. 


For the bread this time, I used 5 cups white flour and 1&1/2 cups wheat flour, and then threw in about a 1/4 cup of honey.   The dough came out very sticky, but we never got to the point of putting it in the fridge, either, since it was made specifically to make pizza dough. 

Grab a big handful of the dough and form it into the ball as it says.  However, then immediately throw it onto a floured surface and roll it to your desired size for pizza.   Pop it into the oven at 450*F for about 5 minutes to give it a nice little prebake.  You don't have to prebake it, but we like the texture it gives the finished pizza.

Make up the alfredo sauce, and spread over the prebaked (or not-prebaked) pizza.  Sprinkle with mozzarella.  Top with chicken and torn spinach leaves.  Sprinkle with just a little more mozzarella to give a little seal.  Put back in the oven (at the same setting) for another 8 minutes or so.  If you did not prebake the pizza, it may need to be around 10-15 minutes to completely bake the bread.  Keep checking it.  =)

And there you have it.  Delicious pizza.  Of course, you can add whatever toppings you like!   Enjoy!

Labels: alfredo, baking, chicken alfredo, pizza, spinach 0 comments

Chicken and Cheese Enchiladas

Saturday, January 21, 2012 | Publish by Thaydra

   My boyfriend has been wanting enchiladas for awhile now.  I came across this recipe  while perusing Pinterest the other day, and thought it sounded simple enough.  I made it tonight, and the results were astounding.  Simple, delicious flavor.  We are not big fans of spicy in this household, and this had just enough of the green chilies to give it some oomph, but not too much for our fragile taste buds.   Even the kids enjoyed it! 


  We put some chicken breasts in the crock pot with a bunch of taco seasoning on high for about 4-5 hours this afternoon, then shredded it to use for this dish.  I highly recommend this!   The recipe originally calls for Monterrey Jack cheese, but since I didn't have that I used the cheddar and mozzarella mix, which I thought tasted fantastic, and so did everyone else.    I imagine you could use just about any kind of cheese that your family enjoys and still have a wonderful outcome.  I am thinking some of those bags of the Mexican cheese blends next time....  


Ingredients:

  • 10 soft burrito shells (I used flour, I imagine corn would be good, too)
  • 2 cups cooked, shredded chicken
  • 1 cup cheddar cheese
  • 1 cup mozzarella cheese
  • 3 tablespoons butter
  • 3 tablespoons flour
  • 2 cups chicken broth
  • 1 4-oz can diced green chilies
  • 1 cup sour cream


Directions:

  1. Preheat oven to 350*F.
  2. In a large bowl, combine the shredded chicken and 1/2 cup of each of the cheeses.   Spread the mixture evenly among the tortilla shells.   Roll the tortillas up and place in an 9x13 pan sprayed with cooking spray.
  3. In a saucepan, melt the butter.  Stir in the flour and cook about 1 minute.  Add in broth and cook over medium heat until it starts to thicken.   *Note- sauce will be a bit thin.  The next two steps thicken it a bit.*
  4. Remove sauce from heat.  Stir in green chilies and sour cream. 
  5. Pour over enchiladas.  Top with remaining cheeses.  ( I put a bunch more cheese on.  We are cheese lovers!)
  6. Bake for 22 minutes, then broil for 3 minutes to brown the cheese.

Labels: cheese, dinner, enchiladas, Mexican 0 comments

Homemade Cinnamon Rolls

Thursday, January 19, 2012 | Publish by Thaydra


 My family loves cinnamon rolls.  Me?  Eh.  I'm not a big fan of cinnamon.  However, I had a bug to bake the other day, and while looking through my Cooking Light Cookbook I came across the recipe that follows.   Now, I've never made cinnamon rolls before, and the process always seemed complicated to me.  After reading through the directions, though, I realized it really didn't seem very difficult, so decided to give it a try.

  The results were great.  The entire 2 pans were gone within a day!  They ate cinnamon rolls all day! I even tried one, and it wasn't too bad.  Not a ton of cinnamon flavor, so I could enjoy it. 

 The cookbook supplied an icing recipe, which I will include, but I must say that though the rolls themselves were awesome, I will not use the icing recipe again.  The flavor was just too much powder sugary for me.  I think I will whip up a cream cheese icing next time.  =)


Ingredients: 

Dough:
1 package dry yeast (about 2&1/4 teaspoons)
1/4 cup warm water (100*F to 110*F)
1/2 cup warm low-fat milk (100*F to 110*F)
1/3 cup granulated sugar
1/4 cup butter, softened
1 teaspoon vanilla
3/4 teaspoon salt
1 large egg, slightly beaten
3&1/2 cups flour, divided
cooking spray

Filling:
2/3 cup packed brown sugar
1 tablespoon cinnamon
2 tablespoons butter, melted


Directions:

1.  Dissolve yeast in warm water in a large bowl.  Let stand 5 minutes. 
2.  Add milk, sugar, butter, vanilla, salt and egg; stir with a wooden spoon until combined (batter will not be completely smooth)
3.  Add 3 cups of flour and stir until a soft dough forms.  Turn dough out onto a lightly floured surface.  Knead until smooth and elastic, about 8 minutes.  Add enough of the remaining flour to prevent dough from sticking to hands.
4.  Place dough in a large bowl coated with cooking spray; turn to coat top.  Cover and let rise in a warm place for 1 hour or until doubled in size.  *If you press two fingers into the dough and the indentation remains then it has risen enough.
5. Mix together the brown sugar and cinnamon for the filling.  Roll the dough into a 15x10-inch rectangle.  Brush with the 2 tablespoons of melted butter and then sprinkle the cinnamon-sugar mixture evenly over top, leaving about a 1/2-inch border.  Beginning with a long side, roll the dough up jelly-roll style.  Pinch the seams to seal, but leave the ends open.  Wrap in plastic wrap and chill for 20 minutes.
6.  Unwrap roll and cut into 3/4-inch slices (you'll get about 20).  Arrange slices about 1 inch apart on a baking sheet coated with cooking spray.  Cover and let rise in a warm place for 1 hour and 15 minutes, or until doubled in size. 
7.  Preheat oven to 350*F.
8.  Uncover dough and bake for 20 minutes, or until rolls are golden brown.
9.  Drizzle with glaze (recipe follows, or create your own!) while still warm.


Glaze from cookbook:

1 cup powdered sugar
2 tablespoons milk
1/2 teaspoon vanilla

Combine ingredients and stir well until smooth.  Drizzle over warm rolls.

Labels: baking, cinnamon, cinnamon rolls 0 comments

Homemade Maple Syrup

Thursday, January 19, 2012 | Publish by Thaydra


   My kids are pretty big on pancakes.   I mean, what kid isn't, really?   However, pancakes just are not the same without syrup!   We ran out of  syrup a while back, and since I am not a big pancake eater, it's just not something I think about when I'm at the store. 

  I would say that I should get better at keeping lists, but had I done that, then I would have bought syrup at the store, and probably never even looked at this recipe.   I had my skepticism, but since today was a snow day, I really wanted to make the kids pancakes, so I figured I'd give it a try. 

  I have to say, I will probably never buy store-bought syrup again.  Not while I have the ingredients to make my own.  And if I don't have the ingredients- I probably shouldn't be buying syrup anyway!  It had a nice, rich flavor.  It was a bit thin, but not terribly so.  My kids loved it. 

The best thing about this recipe is that you can switch up the flavors.  Don't have maple flavoring?  Use vanilla or butter.  Be creative!  I plan to do a few different experiments with this one.  Let me know if you come up with something that tastes great! 

Ingredients:

1 cup water
1 cup white sugar
1 cup brown sugar
1 tablespoon maple flavoring
1/2 tablespoon imitation butter flavoring


Directions:
 
  In a small - medium sized saucepan, bring the water and sugars to a boil over medium-high heat.  Reduce heat to medium-low and add maple and butter flavorings.  Simmer for about 3 minutes.  Remove from heat, let cool, and pour into container. 

*I added another 1/3 cup of brown sugar, since the sauce was a bit thinner than I wanted, and then let it simmer for about 5 to 10 minutes.  Next time, I might reduce the water to 1/2 cup to see if that makes a thicker consistency.

Labels: breakfast, maple, syrup 0 comments

Baked Macaroni, Cheese and Broccoli

Wednesday, January 18, 2012 | Publish by Thaydra

  Macaroni and cheese is one of those all-time comfort foods that just warms your belly when it's cold outside.  And Baby, it's cold outside!  At least for a cold-wimp like myself.  I've always wanted to try the ol' baked macaroni and cheese.  The kind that uses real cheese- not processed cheese like Velveeta.  Not that I don't like Velveeta, but it's just not in the realm of that good-ol-home-cookin' vibe that I was striving for.  Not to mention I've tried it that way before, and while I thought it was okay, my children did not. 


  Enter this recipe.  It caught my eye because of the broccoli.  I  *heart* love *heart* broccoli!   A warm dish of mac and cheese with it?!  Hallelujah!   Oh my.  Swoon.
Yeah.  I made it.  Boyfriend helped and my son grated the cheese.  So it was almost a family affair. 

**Notes**  Ok, so the kids weren't entirely keen on it, but they ate it after some modifications.  Originally garlic was not in the recipe.  I added it, because it really needs it.  Also, they sprinkled more cheese over top and added some salt and pepper.   Next time, I will definitely use a more 3-cheese blend approach.  The cheddar we used was a bit bland.  It had called for sharp cheddar, so that may have made a difference.  Also, next time I want to throw in some seasoned, cooked, diced chicken, or add some tuna.  =)  Overall, very good and satisfying.  I will make it again!

Ingredients:

  • 12 oz elbow macaroni
  • 2 tablespoons butter
  • 1/4 cup flour
  • 1/4 cup minced onion
  • 1/4 cup garlic powder OR minced garlic (more or less to your specific tastes)
  • 2 cups milk
  • 1 cup chicken broth (veggie broth is fine if you are vegetarian)
  • 8 oz (2 cups) cheddar cheese  (next time, I think I'll do some sort of 3-cheese blend)
  • salt and pepper to taste
  • 12 oz broccoli florets (we chopped ours in a chopper)
  • 1/8 cup shredded Parmesan cheese
  • 1/4 cup Italian style breadcrumbs
  • cooking spray


Directions:

  1. Preheat oven to 375*F. Spray a 9x9 (or so) baking dish with cooking spray.
  2. Cook pasta and broccoli together in a large pot using directions on pasta bag.  Prepare al dente.  Drain and set aside.
  3. In a large skillet, melt butter.  Add onions and garlic and cook until golden-about 2 minutes.  Add flour and mix well, letting it brown a bit-about a minute.   Stir in milk and broth.  Let boil, and stir constantly until it thickens- about 5 minutes.  Add salt and pepper to taste.
  4. Once thickened, remove flour mixture from heat and stir in cheddar cheese.  Mix until cheese is melted and smooth.
  5. Add cheese mixture to drained pasta and broccoli mix.  Stir until well combined.  Pour into prepared baking dish.  Sprinkle with bread crumbs and Parmesan.  Spray lightly with cooking spray.
  6. Bake for 15 to 20 minutes, then broil for a few minutes to get breadcrumbs golden. 

Labels: broccoli, cheese, dinner, macaroni, macaroni and cheese, meatless 0 comments

Alfredo Sauce

Monday, January 16, 2012 | Publish by Thaydra

    When my boyfriend and I first got together, I learned that his favorite dinner was chicken fettuccine alfredo.  So, of course, I decided I must learn how to make this.  Now, his ultimate favorite would include sun dried tomatoes and artichoke hearts.  I can do the sun dried tomatoes, but not the artichoke hearts.  Yuck.  However, you could easily add them into this.  Just throw them into the sauce while cooking.

I got this sauce recipe from an old Betty Crocker book I have.   It was a simple, straightforward recipe that I tweaked a bit, and now my alfredo sauce is my boyfriend's favorite.  I think it's pretty dang good, too. 

It is awesome with regular fettuccine.  We've also used it with spinach fettuccine, and it turned out fantastic.  This last time we used colorful bow-tie pasta.  While still good, I think I'll stick to the fettuccine. 


I love this sauce, because it's easy to play with and make all kinds of different dishes. Throw in chicken, tuna, shrimp... whatever sounds good to you.  We've used it as a pizza sauce for a chicken and broccoli pizza, and I thought I had died and gone to heaven! 


I don't really measure anything anymore when I make this.  I just kind of play by sight and tastebuds!  I'll give you general measurements, but play with it to make it suit your tastes. 


Ingredients:

2 generous tablespoons butter
1 cup heavy cream
about 6oz bag of Italian Cheese Six Cheese Blend
Salt and pepper


Directions:

Melt butter in a large saucepan.  Add cream.  Bring to boil.  (This is where I'd add the sun dried tomatoes, if using)  Reduce heat to med-high and cook, stirring frequently, until mixture begins to thicken.  Add salt and pepper.
Remove from heat and stir in cheese.  Keep stirring until well blended.  This is where you use your tastebuds to decide if you need more cheese, salt or pepper. 
Pour over hot prepared pasta, spread on pizza dough, or if you are like me, eat it from the pan! 

Labels: alfredo, cheese, chicken alfredo, sauce 1 comments

Blueberry Cream Coffee Cake

Sunday, January 15, 2012 | Publish by Thaydra


   For the longest time, I thought "coffee cake" was a cake made with coffee.  I mean, it's right there in the name, right?   Well, it's been a while now since I learned that "coffee cake" is cake you eat with coffee.   However, this is the first time I have actually made one.  


 It turned out moist, and delicious.  The topping had just enough of a crispness to it.  The blueberries melt in your mouth.   I ate it with my coffee this morning.  Superb.    It was also super easy to make.  All of the ingredients were ingredients I already had on hand, which is why I decided to make it when I saw the recipe.   I ate it the morning after I made it, after it had cooled down, and it was very good.  I imagine it is even better warm!


I made 2 of them.  One to keep here, and one to take to a birthday gathering I was going to.


I got it out of "Gooseberry Patch Christmas: Book 13", which I checked out from my library.  You can see it (and buy it!) HERE.   =) 


Ingredients:

Cake:
2/3 cup sugar
1/4 cup butter, softened
1 egg
1/4 teaspoon lemon extract  (I used lemon juice since I didn't have extract, and it came out fine)
1 cup plus 1 tablespoons flour, divided
1&1/2 teaspoons baking powder
1/2 teaspoon salt
1/4 teaspoon cinnamon
1/2 cup milk
1 cup blueberries
4oz cream cheese, cubed

Topping:
2 tablespooons sugar
2 tablespoons flour
1/4 teaspoon cinnamon
1 tablespoon cold butter

*Next time, I want to try using brown sugar for the topping instead of white sugar.

Directions:

For cake:
Preheat oven to 375* F.  Flour the bottom of a 9" baking pan.
Blend together sugar and butter until light and fluffy.  Blend in egg and lemon.
In a seperate bowl, combine 1 cup flour baking powder, salt, and cinnamon.  Add alternately with milk to sugar mixture.  Blend in cream cheese.  It will be a bit lumpy, that's okay.
Toss blueberries with 1 tablespoon flour.  Fold into batter.
Pour into prepared pan.

For topping:
Combine sugar, flour, cinnamon and cold butter in a food processer.  Grind until coarse crumbs.  Or, cut butter into ingredients until coarse and crumbly.  Sprinkle evenly overtop the batter.

Bake for 30 minutes or until cake tests done.  Serves 6. 


Labels: baking, blueberries, coffee cake 0 comments

Chocolate Chip Cookies

Thursday, January 12, 2012 | Publish by Thaydra

I've been craving cookies for a few days now.  Okay- weeks.  Not just any ol cookie, but chocolate chip cookies.  Tonight I broke down and made some.  Okay- had my daughter make some.  But she wanted to.  I didn't force her! 

I found this recipe at AllRecipes.com.  It seemed pretty basic, used ingredients I have, and  had a whole bunch of really good reviews, so I decided to try them out. They came out lightly crisp, with soft chocolatey insides. They do not get puffy, nor do they fall flat.     Now, my picture isn't the greatest and I apologize for that.  My boyfriend (who is a photographer) had to take my son to karate class, and I was afraid there wouldn't be any left by the time they got back!  They are so good! 


I will say, 100%, that my craving is sated! 

Ingredients:

  • 1 cup butter, softened
  • 1 cup white sugar
  • 1 cup packed brown sugar
  • 2 eggs
  • 2 teaspoons vanilla extract                   
  • 1 teaspoon baking soda
  • 2 teaspoons hot water
  • 1/2 teaspoon salt
  • 3 cups all-purpose flour
  • 2 cups semisweet chocolate chips

 Directions:

  1. Preheat oven to 350*F.
  2. Combine butter and sugars.   Beat until smooth.
  3. Add eggs, one at a time, mixing well between each one.  Add vanilla.
  4. Dissolve baking soda in hot water.  Add to bowl.  Add salt.  Stir until well blended.
  5. Add in flour, one cup at a time, mixing well between each addition. 
  6. Stir in chocolate chips.
  7. Drop by teaspoon (or tablespoon or whatever gives you the size cookie you like) onto a baking sheet.  I always very lightly spray mine with cooking spray, else I never get them back off. 
  8. Bake for 10 minutes, or until edges are lightly browned.


Labels: baking, chocolate chip cookies, cookies, desserts 0 comments

Chocolate Mint Fudge

Tuesday, January 10, 2012 | Publish by Thaydra


  My daughter is a fan of chocolate.  What tweenager isn't?  Especially girl tweens.   When I broached the subject of what we should have for "dessert" on Christmas, she immediately popped up with FUDGE!  She's a big fan of fudge, too.  So, we did some research and found this recipe on Food.com.   She made it mostly herself, and it turned out spectacular.  If you like the mint and chocolate combination, you will love this.  It is super easy to make, too!

I didn't get a picture of what the fudge looked like when cut into squares. In all honesty, we cut it while everyone was here for Christmas dinner, and it was gone before I thought about taking a picture!!  It's that yummy!

  Ingredients:

  • 1 12-oz bag of chocolate chips (about 2 cups worth)
  • 1 14-oz can of sweetened condensed milk, divided
  • 2 teaspoons vanilla
  • 6 oz white candy coating
  • 2-3 teaspoons peppermint extract
  • green food coloring
  • Assorted sprinkles, if desired

Directions:

  1. Line an 8-inch square pan with wax paper, or with foil lightly greased with butter.
  2. In a heavy saucepan, melt the chocolate chips with 1 cup of the sweetened condensed milk.   Stir until smooth and saucey!
  3. Remove from heat and stir in vanilla.
  4. Spread half the melted chocolate into the pan.  Chill for at least 10 minutes.
  5. Meanwhile, in another heavy saucepan, melt the white candy with the remaining sweetened condensed milk until smooth.  Stir in peppermint and add the food coloring until it is your desired shade.
  6. Spread over the chilled chocolate layer.  Put back into the fridge for another 10 minutes, or until firm.
  7. Warm the remaining chocolate mixture.  Spread over the chilled mint layer.  If decorating with sprinkles, add these now.
  8. Chill for at least 2 hours, or until firm.
  9. Cut into squares and devour!

I have not tried it, but I am betting that the white candy layer in this could be changed to any flavor and color to suit different palates or occasions.   I would like to try it again with red coloring and maybe a cherry flavoring, perhaps for Valentine's Day. 

Labels: chocolate, chocolate mint, dessert, fudge, mint, no bake 0 comments

Caramel Heavenlies

Friday, January 06, 2012 | Publish by Thaydra


  I got this recipe from the Taste of Home website.   They were amazingly easy to make, and so good, I thought I wouldn't have any for Christmas day to share.  I was pretty sure my Boyfriend and Brother were going to devour them up!   Luckily, they are easy to make, so whipping up another batch wouldn't have been an issue.  They are ooey and gooey and so, well, heavenly!   I see these often in my future. 


Ingredients:

12 whole graham crackers  (yeah, I didn't use that many)
2 cups miniature marshmallow
2 cups caramel sauce  (I used the homemade sauce, which is linked.  Store-bought would be fine)
1 cup sliced almonds
1 cup flaked coconut


Directions:

Line a 15-in. x 10-in. x 1-in. baking pan with foil. Place graham crackers in pan; cover with marshmallows.

Heat caramel over medium-low heat until smooth.   Spoon warm caramel over the marshmallows.

Sprinkle almonds and coconut evenly over top.

Bake at 350° for 14-16 minutes or until browned. Cool completely. Cut into 2-in. squares, then cut each square in half to form triangles.

Labels: almonds, bars, caramel, coconut, dessert, marshmallow 0 comments

Holiday Popcorn Mix

Wednesday, January 04, 2012 | Publish by Thaydra


  I love this mix.  It was super easy to make (once you melted the chocolate right), and can be adapted to fit ANY holiday or occasion. Simply add color!   It says you can melt the chocolate in the microwave, but this did not work for me.  It was too clumpy to drizzle.  I melted it on the stove and it was fantastic. 

For Christmas, I used Christmas themed M&Ms, and green and red food coloring.  Adapt candies and colors to suit the current holiday or theme.  One of these I saw even substitued red hots for the M&Ms!   Be creative!


Ingredients:

8 cups air popped popcorn (plain)
2 cups (approx.) pretzels (can be twists or sticks)
1/2 cup M&Ms or desired candies
1/2 cup honey roasted peanuts (or any nut of choice)
1/2 cup semi-sweet chocolate or milk chocolate chips
1 cup white chocolate chips
milk as needed
Sea salt
food coloring in desired colors
sprinkles as wanted


Directions:

  First off, I dipped my pretzels in melted chocolate and rolled them in sprinkles for added festivity.  You can do this step, or not.  It's totally up to you.  It was fun for the kids. 
  Melt chocolate over low heat on stovetop.  If using the white, you can add food coloring or leave it white.  Once melted, dip half of the pretzel into the chocolate.  Place on wax paper lined baking sheet.  If desired, cover with sprinkles.  Do this while chocolate is still sticky!  Let dry. 


Layer a wax-paper lined baking sheet with popcorn.  Sprinkle evenly with roasted nuts and candies.  Melt chocolate chips over low heat on stovetop.  I had to add a bit of milk to mine to get a thin enough consistancy to drizzle.  Drizzle over popcorn mix.  Do the same with the white chocolate, adding food coloring if desired.  Drizzle over popcorn mixture.  Sprinkle with sea salt.  If desired, add sprinkles and colored sugar. 

Once the chocolate drizzles have hardened, break the popcorn mix apart and add coated pretzels.  Store in an airtight container.

Labels: appetizer, chocolate, dessert, holiday, popcorn, pretzels, snack 0 comments

Ginger Pear Crumble

Tuesday, January 03, 2012 | Publish by Thaydra

  Over the Christmas holiday, we had bought a bag of pears from Costco with the idea that we would slice them up and serve them with some homemade caramel for snacking on.  Well, that didn't happen, so here we were with a bag full of pears and in desperate need of something to do with them.  They were starting to turn, so I knew I had to bake them into something, and quick. 

 I found this recipe, which Boyfriend decided sounded perfect.  I made my attempt.  My results were less than spectacular, though the taste was alright.  Enough that he asked that I still blog it, so that next time we can tweek it a bit and hope for better results.  The biggest and most important suggestion I would make is to use fruit that is still firm and not getting soggy.  It came out very wet.  We are talking standing liquid in the pan, almost full.  While the taste was still pleasant, it isn't a very good visual. 


Ingredients:

topping:
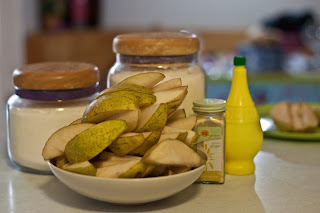
                                       (I had the pears in this picture, and they weren't suppose to be.  My bad!)

  • 1/4 cup whole wheat flour

  • 2/3 cup old-fashioned oats

  • 1/2 cup packed light brown sugar

  • 1 teaspoon ground cinnamon

  • 1/8 teaspoon salt

  • 1/4 cup canola oil


  • filling:


  • 3 pounds firm but ripe pears, peeled, cored and cut into 1/4-inch slices

  • 1 tablespoon fresh lemon juice

  • 1 tablespoon freshly grated ginger

  • 2 tablespoons sugar

  • 1 1/2 tablespoons flour

  •  
     
    Directions:
     
    Preheat oven to 350*F.   Spray an 8x8 pan lightly with cooking spray.
     
    For topping:
      In a medium bowl, combine all ingredients and mix with a fork until thoroughly and evenly moistened.  Set aside.


    For filling:
      Mix all ingredients in a larger bowl.  Stir until pears are well coated. 


    To assemble:
       Dump filling ingredients into prepared pan.  You can be fancy and arrange them all pretty, or just do like I did and dump them and then just make sure they all fit in there okay.   Then sprinkle the topping over top, until all the topping is used.  Bake for about 40 minutes, or until pears are tender and topping is browned. 
     
                                                                             (before baking)
     
                                                                                      (all done!)
     
      Serve hot, with a dollop of vanilla ice cream if that's your thing! 

    Labels: crumble, dessert, ginger, pears 0 comments
    « Newer Posts Older Posts »
    Subscribe to: Posts (Atom)

    Welcome!

    My name is Thaydra, and I am not a chef, or a cook, or a baker, or even really domesticated yet. I am a mom, though, so I do need to prepare food on occasion. I started this blog to keep track of all of the thousands of recipes that I have.


    So many times I try something, and think "Oh my, that sucks!" or "Hmm... this would be good with [insert ingredient here]!" or "Holy cow, that is delicious!!!". But, after months of not touching the recipe, when I go back to it, I can no longer remember which of those categories it fell in.


    Here, I hope to keep track of the different recipes I try, and their outcomes. I can keep notes on what I would do different, or if one kid liked it, or (miracle) both kids like it... And you can add your own notes, too, if you have any!

    Powered by Blogger.

    Followers

    Pageviews past week

    Search This Blog

    Blog Archive

    • ►  2018 (1)
      • ►  September (1)
    • ►  2013 (6)
      • ►  October (3)
      • ►  September (1)
      • ►  August (1)
      • ►  July (1)
    • ▼  2012 (26)
      • ▼  September (4)
        • Smore's Cookies
        • Cowgirl Cookies
        • Honey-Orange-Mustard-etc Glazed Chicken
        • Zucchini Pineapple Muffins
      • ►  March (2)
        • Peanut Butter Chocolate Chip Shortbread Cookies
        • Orange Cream Cheese Bread
      • ►  February (6)
        • White Sandwich Bread
        • Tootsie Roll Fudge
        • Chicken and Spinach Alfredo Lasagna
        • 4-Ingredient Peanut Butter Cookies
        • Honey Oat Bread
        • Rosemary Olive-Oil Bread
      • ►  January (14)
        • Salmon Cakes
        • Skittles Vodka
        • Chicken Alfredo and Spinach Pizza
        • Chicken and Cheese Enchiladas
        • Homemade Cinnamon Rolls
        • Homemade Maple Syrup
        • Baked Macaroni, Cheese and Broccoli
        • Alfredo Sauce
        • Blueberry Cream Coffee Cake
        • Chocolate Chip Cookies
        • Chocolate Mint Fudge
        • Caramel Heavenlies
        • Holiday Popcorn Mix
        • Ginger Pear Crumble
    • ►  2011 (22)
      • ►  December (7)
      • ►  November (5)
      • ►  October (4)
      • ►  September (3)
      • ►  August (3)

    Labels

    alcohol (1) alcoholic drink (1) alfredo (3) almond (1) almonds (2) appetizer (4) apple (2) artisan bread (1) artisan bread in five minutes a day (1) baking (20) banana (2) banana bread (1) bars (1) blueberries (2) blueberry (1) bread (10) breakfast (1) broccoli (2) cake (1) canned salmon (1) caramel (3) caramel apple (1) casserole (1) cheese (4) cheesecake (2) chicken (4) chicken alfredo (3) chicken drumsticks (1) chocolate (4) chocolate chip cookies (3) chocolate chips (2) chocolate mint (1) cinnamon (1) cinnamon rolls (1) coconut (2) coffee cake (1) cookies (7) cooking (1) cream cheese (1) crumble (1) dessert (11) desserts (1) dinner (7) easy (3) enchiladas (1) food (2) fudge (2) garden (1) ginger (1) gingersnap (1) green beans (1) gyoza (1) hamburger (1) hawaii (1) holiday (1) honey (2) honey oat (1) kale (1) lasagna (1) lunch (1) macaroni (1) macaroni and cheese (1) maple (1) marshmallow (1) meatless (1) Mexican (1) mint (1) moonshine (1) muffins (4) mustard (1) no bake (1) non-yeast bread (1) oat (1) Olive Garden (1) olive oil (1) orange (2) Oreos (1) peanut butter (4) pears (1) pie (2) pineapple (1) pizza (1) popcorn (1) potatoes (1) pretzels (2) pumpkin (4) pumpkin pie (1) quick (1) rolls (1) rosemary (1) salmon (1) sandwich bread (1) sauce (2) sausage (1) side dish (1) skittles (1) sloppy joes (1) snack (1) snickerdoodles (1) soup (1) spinach (3) stir-fry (1) sweet bread (1) syrup (1) teriyaki (1) Thanksgiving (3) tootsie rolls (1) toppings (1) vodka (1) white bread (1) wonton (1) yeast (1) yeast bread (3) zucchini (2) zuppa toscana (1)
    Copyright (c) 2010 Our Taste Tests. Design by Template Lite
    Download Blogger Templates And Directory Submission.